Paneer, Lentil, and Butternut Squash Bowl

Posted in Uncategorized on January 25, 2015 by thekytchnwytch

When I cook during the week, I like to have some basics already prepared so dinner doesn’t take three hours to make. On my weekend, I like to precook things that are fairly versatile and in amounts that will last about five days or so. I tend to go on “cuisine kicks”, so these ingredients will vary. These “kicks” usually vary between Japanese, Vietnamese, Spanish, Turkish, and Indian (northern and southern), though I have had spurts of Irish, Russian, and Italian sneak in there. Generally, these are cusped by fusions of these. I think of my kitchen as a “food rainbow” with a pot of deliciousness at the end of it. But I digress.

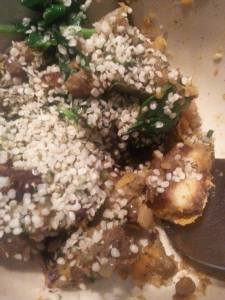
This week, I made large brown lentils and roasted a butternut squash and poblano chilies. With some of these and other ingredients, I made stuffed bell peppers for lunches this week. I had some leftovers, so I decided to improvise a breakfast combining ingredients in a new way. This was the result:

10947700_321883998015626_1330674534_nI sauteed finely chopped vidalia onion in processed (don’t judge me!) coconut oil in a cast iron skillet. I removed the onion and added more oil. Measuring by hunger, I added to the oil salt, fresh ground black pepper, ground cumin, and garlic powder. I added cubed paneer and browned the cubes on two sides. I added back the onion as well as poblano, butternut squash, brown lentils, and a handful of fresh spinach leaves. I turned off the heat, but I left the skillet on the hot burner as I folded everything together and wilted the spinach. When everything was combined well, I plated it and garnished it with raw hemp seed.
I somehow managed to save half of what I made for breakfast tomorrow. Being adventurous is worth it.

Kale Chips

Posted in Uncategorized on December 23, 2013 by thekytchnwytch

I often buy kale and don’t get much chance to eat the whole bag before it gets funky. I like to buy the precut and washed kale because, well, with some things I am okay being lazy. 

I decided to use today, a rainy day off from work, as a chance to catch up on a few things and take the opportunity to make some snacky stuff to have around. It’s the “holiday season” so, clearly, this means everyone must make everything as fatty and sugary as possible so I can gain all the weight back that I worked so hard to drop. Also, this means my food inhibitions go on the vacation I don’t get to have. Blarg.

Several years ago, I received a food dehydrator as a gift. It sat forever in storage until recently. Roomio and I have been experimenting with making beef jerky with some good results. That, however, is another entry entirely.

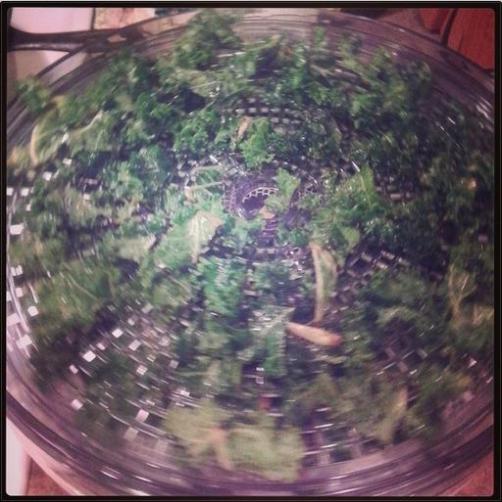
While I nibbled on leftover homemade-from-scratch pizza and drank copious amounts of rum and Coke, I decided that making kale chips was not only a good idea, it was my duty as a food nerd. 

I made three flavors: salt and fig infused vinegar, salt and pepper, and soy sauce. They are currently pirouetting in the dehydrator and making the house smell amazing. This, I promise, is only the first of several delicious dehydration experiments.

Image


Cooking with Grains

Posted in Uncategorized on June 7, 2012 by thekytchnwytch

Cooking with grains is really easier than people think it is.  Grains were the first kinds of food that humans domesticated.  It is really a good thing to learn how to cook fresh rather than to use pre-made or pre-processed products such as minute rice and frozen “healthy” dinners.  Many grains other than just rice can be made in a rice cooker.  They just take a little bit of tweaking.  I HIGHLY recommend that if you don’t own ANY OTHER SMALL APPLIANCE, do yourself an amazing favor and get yourself a rice cooker.  Once you start using it, you’ll wonder how the fabric of the universe maintained itself before them.

Some folks get hung up on exact measures. Well, in baking that’s crucial. In cooking, not quite so much. Cooking usually leaves a LOT of wiggle room and can be very forgiving. I much prefer the use of ratios. Rather than saying “one cup of grain to two cups of water”, I’d rather say “one measure of grain to two measures of water”. That’s easier to remember when converting a recipe up or down in servings. So, of the grains below, the measures are actually ratios.

Rice Depending on the type, rice takes a different ratio of grain to water.  White rice is 1:2.  That is, one cup of rice to two cups of water. Brown rice is about 1:2.5.

The rest are the ratios I use. Depending on whether I cook the grain with something else will alter the liquid needed, but it’s somewhat of a “just watch it and adjust accordingly” kind of thing.

Amaranth 1:3

Barley 1:3

Buckwheat 1:2

Bulgur 1:2

Millet 1: 2.5

Quinoa 1:2

Peasant Bread

Posted in Recipes, Uncategorized with tags on May 8, 2012 by thekytchnwytch

“Low carb”? Not in THIS home! Bread is and always will be a staple in my home; fad diets be damned! That being said, I can’t say that I’m a huge fan of most store-bought bread. Don’t get me wrong, now, it has its moments. There’s nothing like using cheap sliced white bread to make grilled cheese like my mama used to make. It fits the slices of the processed American cheese food so perfectly!

I love baking my own bread. I wouldn’t consider myself to be much above “n00b” status as breadmaking is a serious art and craft. This recipe is so easy, though, that it takes just about an hour from start to finish.

One of the different aspects of this recipe is that you start with a cold oven. This allows time for the bread to rise.

I will post pictures after the next time that I make a loaf so that my descriptors aren’t as odd or potentially confusing. If you make this recipe, let me know how it turns out!

Ingredients

2.5 cups all-purpose flour

6 fl. oz. warm water (about 110°F is optimal if you have an instant read thermometer)

3/4 teaspoon salt

1 Tablespoon olive oil (butter or vegetable oil will work just as well, but don’t use margarine as it’s more water than fat)

1 package of Dry Active Yeast (that’s about 1 1/2 teaspoons or 1/4 ounce)

Method

1. In your measuring cup of warm water, add the yeast, stir it gently with a fork to break up the clumps, and let it “proof”. That means, let it get frothy and foamy at the top. That should take about 5-7 minutes. If it doesn’t get frothy, your yeast is no longer active and you should try another packet. While your yeast is proofing, measure out your other ingredients.

2. In a large bowl, combine the flour and salt by gently stirring it with a whisk or fork.

3. Add the yeast, water, and oil. Stir until stirring seems silly. You’ll know when you get to that point.

4. When stirring seems silly, it is time to knead the dough. On a clean, smooth surface, dump the dough and scrape out all the bits that are still stuck to the bowl. Mash it all together with your hands and start kneading. When the consistency is that of chewed gum (eww, I know), then smooth it into a lump and put it into a baking dish lined with parchment or lightly oiled. (Parchment is the way to go. Just sayin’.)

5. Once it is in the baking dish, cut some slits in it in whatever design you want. I just usually cut three parallel slits. Cover the dish with foil and place into A COLD OVEN.

6. When your bread, covered with foil, is in the COLD OVEN, turn it on and up to 400°F. Once your oven has reached 400°F, set your timer for 40 minutes.

7. When your timer sounds, uncover the bread and put it back into the oven for another 5 to 10 minutes or until it’s the shade of brown you think looks best.

8. When you remove the bread, and this is the most difficult part of the whole process, let it sit for several minutes until it is cooled.

9. Eat. Enjoy!

10. Repeat steps 1-10.

To store it, make sure you keep air as far away from it as possible. It will stale quickly. If it does stale, though, you can just use it in other recipes that I’ve posted on this blog! WIN! I don’t think you’ll have a problem with it getting to that point, though. It’s that good.

Persimmon Cookies

Posted in Uncategorized on December 25, 2011 by thekytchnwytch

I had some persimmon pulp last year that I urgently needed to consume. I went strolling along the interwebs and came across one that looked delish. Below is my tweaked version of the recipe and below that is the link to the original site. It’s worth checking out. They have a lot of good-looking recipes.

Ingredients

1 cup really ripe persimmon pulp (I leave the skins in it)
1 tsp. baking soda
1 cup dark brown sugar
2 tsp. ground cinnamon
1\2 tsp. ground cloves
1 tsp. salt
1 beaten egg
2 cups all-purpose flour
1 cup raisins, or combination of any small dried fruits you like (cranberries are tasty!)
1 cup chopped nuts
1/2 cup butter or butter-flavored shortening, melted

 Directions:

Dissolve the baking soda with the persimmons. Using a good old-fashioned spoon, mix the ingredients in order given, adding the melted butter last. Drop by rounded spoonfuls onto a greased cookie sheet. Bake at 375° for 10-12 min.


Original Recipe: http://www.epersimmons.com/recipes.htm#percooky

Three Sisters Soup

Posted in Historical Cooking, Native American, Recipes, Soups and Stews with tags , , , , , , , , , , , , , on November 22, 2011 by thekytchnwytch
Photo of Three Sisters Soup

Three Sisters Soup

We have an upcoming event this weekend where I work as a mestiza cook! “Giving Thanks” is one of our biggest events and we always appear on our local news station. Today, we showcased an Apalachee-style recipe called “Three Sisters Soup.” My co-cook, Helena, always does really well in the televised cooking segments and I am happy that she agrees to do them. We try to show something different every year. In the past, Pollo Moruna was one we showed.

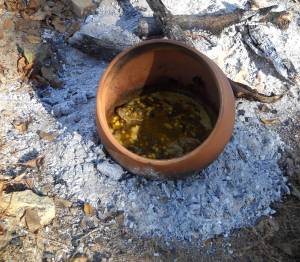
The “Three Sisters” refers to the three vegetables in this soup: corn (maize), beans, and squash. The Apalachee grew these three crops well before the Europeans ever visited what is now Florida. The Apalachee were well-known for their prolific farms, which was one of the reasons the Spanish came to the territory. The reason they are called the “Three Sisters” is because of their method of cultivation. These three crops are grown together. The corn is planted first and each stalk is planted on its own mound that is about 18 inches wide, about 4-6 inches high. When the stalk is about knee-high, the bean is planted right at the base. The type of bean grown locally was a  Phaseolus vulgaris. The kidney bean is a well-known member of this species and is a vine rather than bush bean. As the vine grows, it uses the corn stalk as a pole for support. The bean returns the favor of support by supplying the corn with nitrogen that it adds to the soil. Corn grows best in nitrogen rich soil. Let’s not forget about the third sister, squash! Squash is also a vine and has nice broad leaves. As the squash grows along the ground in and among the corn and bean mounds, it acts as a natural weed suppressant. It shades the soil, filtering the sun and making weeds grow slower. It also helps to slow water from evaporating from the soil. That’s a very helpful action considering the Apalachee were watering immense fields by hand. The National Center for Appropriate Technology’s (NCAT) Sustainable Agriculture Project has a great publication you can download for free that goes further into this method of companion planting. To view the section that discusses just the Three Sisters, go here. It’s funny how we sometimes think that our methods of conservation are “new” and “innovative.” Sometimes we just need to look at the past and learn from what has already been done and make further improvements on those methods rather than trying to reinvent the wheel. But I digress.

This recipe is as simple or as complicated as you want to make it. Native American recipes of yore weren’t as seasoning-heavy as today’s recipes sometimes are. Most of the spices that we use today were introduced by the Europeans, e.g. cinnamon, black pepper, and nutmeg, so none of them are represented in this recipe.

The term “sage” is, actually, quite general. It can refer to several different plants that aren’t very similar. Plants that contain the term “sage” cover several different families and not all are edible. Salvia officinalis is an herb that is in the mint family. This is the “rubbed sage” you might have in your kitchen cabinet at home. This is the species represented in the recipe below as it is the most readily available species in grocery stores, but it is not native to the New World. It comes from Southern Europe and the Near East. Salvia apiana, however is what is native to the New World and it is found in North America’s Southwest region. This is the sage that is sacred to the Native Americans and is the one that is burned in ceremonial settings. To simplify things, and I love simplification where it’s appropriate, we will be using Salvia officinalis in this recipe. What local herb(s) the Apalachee may have chosen in this recipe, I don’t know. We probably won’t know either due to the fact the Apalachee didn’t have a written form or record of their language until after the Europeans came and what we do know has largely been lost or wasn’t deemed “significant enough” by the Spanish to merit recording.

Now that we know a little of the history of this recipe, let’s talk about the recipe itself. This recipe is very forgiving. You really don’t need to worry much about exact measurements and substitutions can easily be made. There are more tips after the recipe.

Prep time: 15 minutes

Cook time: about 1 hour

Ingredients:

•2 quarts water

•1 cooked turkey thigh OR 2 cooked turkey wings (smoked turkey tastes best) OR 1 ½ cups cooked turkey meat

•2 cups prepared corn

•2 cups prepared and rinsed kidney beans

•1 cup cubed pumpkin/squash

•1 medium onion, chopped

•Several fresh chopped sage leaves or 2 teaspoons dried/rubbed sage

•2 teaspoons salt (or more to taste)

Directions

1. Put the 2 quarts of water and turkey into a large pot and bring it to a boil. Boil for about 15 minutes.

2. To the same pot, add the corn, beans, and pumpkin/squash. Lower heat to medium-high and allow them to continue to gently boil for another 15 minutes. Add a little more water if necessary.

3. Add the onion, sage, and salt. Lower to medium heat and allow to cook for a further 30 minutes.

4. If you used meat still on the bone, remove turkey from the soup and place on a plate. Remove the meat from the bones and tear or cut into small pieces. Be careful, it’s hot! Discard the bones and return the meat to the soup.

5.Serve and enjoy!

Pro Tips:

It’s a good way to use your Thanksgiving leftovers.

You can use sweet potato rather than pumpkin or squash.

Our recipe is very basic. It is very versatile and can easily be changed to fit your tastes.

This is a perfect recipe for the crock pot. Just put everything in at once and let it cook for a few hours on “low.”

Any kind of bean works well: lima, pinto…or even a mix!

Add a few Tablespoons of mashed potatoes as a thickener.

Meatloaf

Posted in Comfort Food, Entree, Southern Cooking, Uncategorized with tags , , , , , , , , , on November 14, 2011 by thekytchnwytch

Ingredients

  • 1 onion, chopped
  • 1 Tablespoon butter
  • 1 pound ground beef
  • 1 pound lean ground pork
  • 1 egg
  • 1 Tablespoon Worcestershire sauce
  • 1/2 cup milk
  • 1/2 cup dried bread crumbs (flavored is good too; you can even grind up your favorite croutons)
  • 1 teaspoon garlic powder
  • salt and pepper to taste
Sauce
  • 1/2 cup ketchup
  • 2 Tablespoons brown sugar
  • 2 Tablespoons prepared mustard
  • 1 Tablespoon soy sauce
  • salt and pepper to taste

Directions

1. Preheat oven to 350°F (175°C.)

2. Sauté the onions in a Tablespoon of butter. Put sautéed onion in a large bowl.

2. To the same large bowl, add and combine the beef, egg, onion, milk, and bread (or bread product of your choice.) Season with salt and pepper to taste and place in a lightly greased 5×9 inch loaf pan, or you can form it into a loaf and place it in a lightly greased 9×13 inch baking dish. In lieu of greasing the pan, you can also line it with aluminum foil. That also makes removing it from the loaf pan much easier.

3. In a separate small bowl, combine the brown sugar, mustard and ketchup. Mix well and pour over the meatloaf. If you’re a big sauce lover, you can make extra to pour over it after it’s out of the oven.

4. Bake at 350°F (175°C) for about 1 1/2 hours. As with anything else you cook, checking the internal temperature with an internal thermometer is always best. Ovens vary greatly.

Moorish Chicken (Pollo Moruna)

Posted in Historical Cooking, Mediterranean, Recipes, Saint Martha's Hearth, Spanish with tags , , , , , , , on November 13, 2011 by thekytchnwytch

The combination of dried fruit and meat was wide-spread in the kitchens of well-off Moors in 13th, 14th and 15th century al-Andalus – the Arab name for the part of the Iberian Peninsula that was conquered by the Moors.  We confess that the addition of Spanish pimentón, made from red peppers which arrived from America in the 16th century, makes this a slightly modernized version of the 800 year old recipe. This was the second recipe we prepared in my cooking workshop “Saint Martha’s Hearth.”

Serves 8

Ingredients

4.5 lbs chicken cut into chunks (you can use boneless, skinless breasts)

¼ cup olive oil

Salt and Pepper

1 cup slivered almonds

½ cup olive oil

5 Vidalia onions cut into thin slices

1 small red chili pepper left whole

2 Tablespoon Spanish Smokey Pimentón

1 Tablespoon ground cinnamon

1 teaspoon ground black pepper

2 cups water

1 bay leaf

1 cup raisins

2 Tablespoons honey

2 Tablespoons Balsamic vinegar

Modern Directions

1. Preheat the oven to 350°F.

2. Wash and dry chicken.  Season with salt and pepper.

3. In a large (stove and oven proof) casserole dish, heat on the stovetop ¼ cup olive oil until shimmering.  Brown the chicken pieces in batches and set aside on a plate.

4. To the same large casserole dish, add the Spanish Pimentón, cinnamon and black pepper. Heat the spices on low heat, then add water and bay leaf.

5. Return chicken to the casserole dish, bring to simmer. Then place in the oven and bake covered for 60 minutes.

6. While chicken is baking, in a heavy bottomed frying pan heat ½ C. olive oil until shimmering. Add almonds and toast on low heat for 5 minutes until browned. Set almonds aside on a plate.

7. Add onions and the chili pepper to the same heavy bottomed frying pan. Sauté 20 minutes until onions have caramelized.

8. To the caramelized onions, add the almonds, raisins, honey, and vinegar. Discard the chili pepper.

9. Remove chicken from the oven. Stir in the onions, almonds, and raisins mixture. Set the combined dish aside to sit for at least 15 minutes to allow the flavors to meld.

Honey Rum Apple Pie

Posted in Dessert, Recipes, Toni Verticelli Farmer with tags , , , , on November 13, 2011 by thekytchnwytch

For the dough:

2 cups all-purpose flour
2/3 cup cold butter OR butter-flavored shortening, cut into small cubes
1/4 cold water (on side)
1/4 teaspoon salt

1. Cut the butter OR shortening into flour until the mix looks like large crumbs.

2. Drizzle cold water in slowly until mix makes a firm dough ball.

3. Divide in half and wrap in plastic wrap.

4. Refrigerate dough balls for 30 minutes.
For the filling:

7 medium tart apples cored, peeled and sliced.
1/4 cup honey
1/2 cup granulated sugar
1 teaspoon lemon juice
2 teaspoon spiced rum or imitation rum extract
1 teaspoon cinnamon
1/2 teaspoon nutmeg
1 teaspoon all purpose flour

Directions

1. Preheat oven to 375°F.

2. Mix filling well and set aside.

3. Roll out one ball of dough and line a pie pan. Add filling.

4. Roll out second ball of dough and cover.

5. Trim edges and pinch closed. Cut 4 small slits in top to allow for steam.

6. Brush top lightly with a mix of a small egg and milk or cream.

7. Bake at 375°F for 45 minutes.  Let cool. Serve and enjoy!

Chicken Pecan Lasagna

Posted in Comfort Food, Entree, Lorie Reed, Pasta, Recipes with tags , , , , on November 13, 2011 by thekytchnwytch

This recipe was created by my cousin Lorie Reed when she worked as a caterer. It was developed for a bride who wanted lasagna but was worried about marinara sauce ruining her wedding dress.

A new take on traditional Lasagna “Creamy, cheesy, chickeny lasagna – you’ll fall in love all over.

Ingredients

12 lasagne noodles
1 (10.75 ounce) can condensed cream of chicken soup
2 (10.75 ounce) cans condensed cream of mushroom soup
1 cup onion (optional and it tastes best if you sautée it first)
1/2 cup grated Parmesan cheese
1 cup sour cream
1/4 cup mayonnaise
1 raw egg
garlic salt to taste
1 pint cottage cheese
2 cups diced, cooked chicken meat
2 cups shredded mozzarella cheese
1 cup toasted pecans

Directions

Preheat oven to 350 degrees F (175 degrees C).

The noodles.
Bring a large pot of lightly salted water to a boil. Add noodles and cook for 8 to 10 minutes or until al dente; drain.

The sauce.
In a medium bowl, combine chicken soup, mushroom soup, onion, Parmesan cheese, sour cream, mayonnaise, cottage cheese, egg, and garlic salt. Set aside.

Putting it all together.
In a 9×13 inch baking dish, layer 1/3 of the noodles, sauce, chicken and cheese; repeat 3 times, ending with cheese.

Top with toasted pecans for the finish.

Bake covered in preheated oven for 1 hour, removing the foil for the last 5 minutes or until browned.